Your Cart is Empty
Free Next Day Delivery on Orders over €80

Find answers to your Annie Sloan product questions here
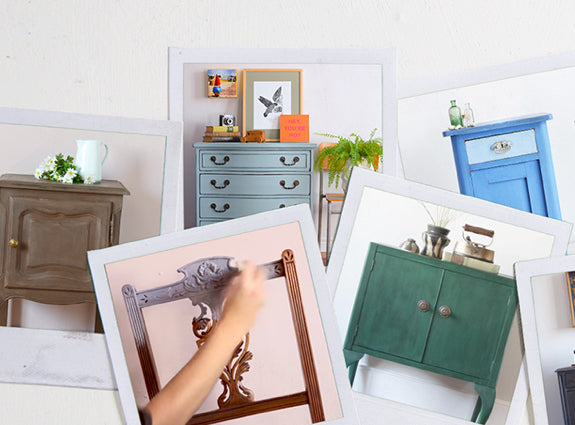
You won’t believe how easy it is to use Chalk Paint®. Let’s go over some basics to get started.
There is no need for priming or sanding with Chalk Paint® by Annie Sloan! All you need to do is clean and wipe down your furniture.
Stir your chosen Chalk Paint® colour. A good tip is to leave the tin upside down for an hour before painting, to let the pigment mix. Then dip your brush and paint in every direction! Make sure the whole piece is covered.
Apply a second coat when the first coat is dry. The paint will be touch dry in ten minutes, and fully dry within 1 – 3 hours (depending on how warm your environment is).
We recommend leaving a day before waxing. Once the paint is fully dry, apply the wax thinly in circular motions. You can use a brush or lint-free cloth for this. Work in sections so you can keep track of where you’ve been!
Once applied, use a lint-free cloth to remove any excess wax with a light rub. You can use the furniture as soon as the wax is dry, but the curing period takes 2 weeks until it is fully durable.
And that’s it, finished!
Check out the video on how to useChalk Paint®
Annie Sloan's unique, tough, water-basedWall Paint is ready to take whatever life throws its way.
You can clean off everyday marks and spills with ease, making Wall Paint high-functioning and practical.
Apply with a roller or large Wall Paint Brush (whichever you prefer).
There is no need for waxing.
Please note that an extra coat may be required when going from light to dark colours, or vice versa.
Check out the video tutorial onWall Paint
Make sure your surface is dry and free of dust. Do not use Chalk Paint Lacquer over surfaces which have been waxed.
Stir before and during use. Use a high-quality brush or roller and apply thinly in sections. You can dilute lacquer with 10% water if you are applying over Chalk Paint, to produce a more even finish.
Immediately wash your brush in warm, soap water. Allow two weeks for the curing process to finish.
Check out the video tutorial onLacquer
Use to give your furniture an aged, textured look.
First, make sure to apply a thin layer of Clear Chalk Paint® Wax and remove any excess with a clean, lint-free cloth.
Using a high-quality brush, or lint-free cloth, next apply the Dark Wax. Push it into the paintwork to bring out brush marks and recesses. Apply as thinly or thickly as you desire, depending on how aged you want your piece to look.
Wipe off any excess with Clear Wax, making sure every part of your piece has been waxed at least once.
Check out the video tutorial onClear Wax
Check out the video tutorial onDark Wax
Available in shades of gold and silver, use this to add a metallic touch to your furniture.
Squeeze a little bit of the Gilding wax onto a lint-free cloth or a fine detail brush.
Apply to the desired space; applying gently for a more distressed look to let paint show underneath, or with more force for fuller coverage.
If you have applied too much, you can wipe some Annie Sloan Clear Chalk Paint Wax to remove it.
Leave overnight to harden.
Check out the video tutorial onGilding Wax
This can be used to transfer an image onto furniture, walls and even fabric!
Have your image printed with a laser printer or photocopy it onto normal copier paper. Images transfer in reverse, so you might need to flip the image before printing (especially when using text).
Carefully cut your image out. Then use a surface that has fully dry paint but no wax. Brush a thin layer of Image Medium over the place you would like the image to go. Try applying the Image Medium in a similar shape & size as the image you are using.
Apply a very thin layer of Image Medium to the image right side up, and while this is still wet, slide your image onto your already-glued surface face down. Make sure to smooth over any air bubbles and make sure it’s totally stuck to the surface (don’t forget the edges!).
Once completely dry, wet the paper with a little water. When it is damp (not soggy), start to rub it in little circular movements with a cloth or your finger. The paper will start to come off in layers. If it looks cloudy – keep going!
Once all the paper is off, the image will be clear, although it may look a little dull once it is dry, so give a coat of clear Chalk Paint® Wax. You can rough it up a little by gently sanding the edges, or leave it as a crisp image. Ta-da!
Sand down if the surface you are using is uneven (this step might not be necessary for everyone). Apply a thin layer of Gold Sizewith a brush onto the area you want to cover. Wash your brush in hot water immediately after use!
Wait until the Gold Size turns clear and is sticky before applying your Metallic Leaf (it goes a purple colour before turning clear).
Transfer Leafhas a backing sheet and is useful for gilding large surfaces.
Loose Leaf is ideal for carved surfaces. Putting talcum powder on your hands before handling the leaf is helpful.
When using Transfer Leaf, lay the sheet onto the Gold Size area with the backing sheet face up. Brush firmly all over the backing sheet to flatten. Gently peel back the backing sheet.
Continue this process until you have the desired surface covered.
Check out the video tutorial onTransfer Metal Leaf in Gold
Mix well before use and ensure the surface you’re using is dry and dust-free.
For detailed work, apply Chalk Paint® Lacquerbefore applying the Pearlescent Glaze. Alternatively, you can use Chalk Paint Wax after applying the glaze.
Apply one or two coats of the Glaze with a flat brush, Sponge Roller or Detail Brush (if you want a patterned finish).
You can also use the Pearlescent Glaze to make opaline shades by adding a small amount of any Chalk Paint® colour to the Pearlescent Glaze.
Drying time is approximately 2 hours.
Immediately wash your brushes or rollers in warm, soapy water.
Check out the video tutorial onPearlescent Glaze
A two-part process to achieve a crackled finish, like you would see in Renaissance paintings and aged furniture. Can be used over image transfers, decoupage and stencilled surfaces.
Apply a coat of Craqueleur Step 1 to your fully dried painted surface. If you would like larger cracks, apply a second coat of Step 1 after allowing sufficient drying time for the first coat.
When Step 1 is dry, apply a layer of Craqueleur Step 2. Applying thickly will create larger cracks. Let Step 2 dry for 10 – 15 minutes.
Finish with a hair dryer on medium to high heat to produce cracks.
Annie Sloan paint is extremely beginner-friendly! As a rule of thumb, 1 litre of paint should cover 13 metres squared.
Generally, one coat should suffice, but depending on how dark your surface is/how light the paint colour you have chosen is, you may need a second coat.
Chalk Paint® generally works on every surface, without priming or sanding. Leave the tin upside down for a few moments to allow the pigments to mix, then shake for 30 seconds. Add a little water and stir, if the paint seems thick.
Generally, wiping away dirt is all the preparation needed.
In rare cases where your piece has loose paint, rust, or other debris - or if your piece is particularly shiny/glossy, made of melamine or laminate, you may need to sand it down.
If you are working with untreated pine with knots, you will need to use a clear shellac over the knot to prevent a stain from coming through.
You will need to seal the paint with either a wax or a varnish/lacquer. Leave 24 hours in-between painting and waxing/using the lacquer.
Yes! You can. It works beautifully on wooden kitchen cabinets, but make sure to apply 3 coats of wax to ensure durability; or varnish, for a more washable finish.
Annie Sloan Chalk Paint® is a family run business which exclusively supports independent businesses to keep our communities vibrant, connected, and unique. The paints are non-toxic, water based and virtually odour-free.
Using Chalk Paint® is a guarantee of helping local businesses and committing to environmental-friendly products which enable you to celebrate your own individual style.
This is more than a brand. It is a movement to promote creativity and sustainability.
Our national shipping operates on a weight-based system. Orders below under 2kg will be sent at €4.00, and orders above will be sent at €7.40.
For larger items, such as furniture, please contact us to arrange collection or delivery.
Our shipping is tracked, next day delivery (when ordered by 12 mid-day).
Please email us directly at twentysixeclecticmix@gmail.com for any modifications you wish to make to your order.
Please contact us either by phone or email for your tracking number. Your order may then be tracked using GLS tracking.
Of course. Please ring us on (067) 32805 to arrange this.